Billcrop.com

Sign in

Login into your billcrop.com account, to access the CRM tools for your business.

Valid email : example@gmail.com

password:###example

And click Login


Dashboard

Gives you a summary of all activities in your  CRM

CRM

Customers Section:

To add new client

Select customer > Add New > Input the filed and Save

Or

 Select customer > contact list > Add New  Input the field  and Save

To Create a Contact Group

Select Customers > Contact Group > Add New, Input Details and click Save

To Import Contact

Select Customers > Contact List> Import, select contact group or add new contact group , select the file and click  Import Contacts

To View,Edit and Delete Contact

To View Contact

Select Customers > Contact List> on the Action section select


To Edit Contact

Select Customers > Contact List> on the Action section select


To Delete Contact

Select Customers > Contact List> on the Action section select


Leads Section:

To Add New Leads

Select Leads > Add New Clients, input details and click Save

To Import Leads from spreadsheet .xlsx format:

  • Only XLSX File Are Allowed.
  • First Row Need To Keep Blank Or Use For Column Name Only.
  • Required Field Must Needed.
  • Download a sample file

Select Leads > Imports  and input fields, select the file and click  Import Leads

To view leads in Kanban Views

Select Leads > Kanban Views options

Add New Project

Select Projects > Add New > Input Project details and  Save

Add New Task

Select Task > Add New, input details of the task and click Save.

Change Tasks View to Kanban View

Select Tasks > Kanban View to see your tasks in the Kanban board view.

Change Task View to List View

Select Tasks > List View to see your tasks in list view

Import Product List

Select Products > Product list > Import, drag and drop the required product list file and click Import products


Add New Service

Select Service > Add New, input the details and select save

Or

Select Service > Service List > Add New,  input the details and select save

View Service list

Select Service > Service List >  to View the list.

Add New Supplier

Select Supplier > Add New, input the details and select save

View Supplier list

Select Supplier > Supplier List >  to View the list.

Create Purchase Orders

Select Purchase > Create Purchase Orders > input all the necessary details and click Save


Or

Select Purchase > Purchase Order > Add new > input all the necessary details and click Save

View Purchase Orders

Select Purchase > Purchase Order, view all orders

Add Purchase Return

Select Returns > Purchase Returns > Add New, input the field and select Save


Add Sales Return

Select Returns > Sales Returns > Add New, input the field and select Save

How to add New Account

Select Accounts > Add New Account > Input the fields  correctly and click Save

OR

Select Accounts > List Account >Add New  Input the fields  correctly and click Save

How to view account

Select Accounts > View List Account , to view the list of accounts.

How to View Income/Deposit

Select Transaction > Income/Deposit  to view Income/Deposit

How to Add Income/Deposit

Select Transaction > Income/Deposit > Add New , complete the fields and click Save

How to View Expenses

Select Transactions > Expenses, and view the expenses

How to Add Expenses

Select Transactions > Expenses > Add New , fill the required fields and click Save.

How to check Income Report

Select Transactions > Income Calendar , navigate the month, week, day option

How to Check Expense Report

Select Transactions > Expense Calendar , navigate the month, week, day option.

How to add new Staff

Select StaffAdd New,  Input details of the new staff member and click Save.


OR


Select Staff > All Staff > Add New,Input details of the new staff member and click Save.

To View and Add Staff Roles

Select  Staffs > Staff Roles > input details of the staff and select Save.

How to View Account Statement Report

Select Reports > Account Statement > Select Account, date and transaction type  and click View Report

How to View Detail Income Report

Select Reports > Detail Income Reports> Select Account, date and transaction type  and click View Report

How to View Date Wise Income Report

Select Reports >  Date Wise Income > Select Account, date and transaction type  and click View Report

How to View Detail Expenses Report

Select Reports >  Detail Expenses Report > Select Account, date and transaction type  and click View Report

How to View Detail Wise Expense Report

Select Reports >  Detail Wise Expense > Select Account, date and transaction type  and click View Report

How to View Transfer Report

Select Reports >  Transfer> Select Account, date and transaction type  and click View Report

How to View Income VS Expenses Report

Select Reports >  Income VS Expenses > Select Account, date and transaction type  and click View Report

How to View Report By Payer Report

Select Reports >  Report By Payer> Select Account, date and transaction type  and click View Report

How to View Report By Payee Report

Select Reports >  Report By Payee> Select Account, date and transaction type  and click View Report

How to make System Settings

Select Settings > Company Settings > System Settings Fill the details correctly and  select Save Settings

How to make Invoice & Quotation Settings

Select Settings > Company Settings > Invoice & Quotation

fill the details correctly and  select Save Setting

How to make Payment Gateway Settings

Select Settings > Company Settings > Payment Gateway

fill the details correctly and  select Save Setting

How to add Custom Logo

Select Settings > Company Settings > logo ,remove the default logo, add the new logo and click Upload

How to add new Email Template

Select Settings > Email Template > Add New,  fill the necessary fields and Save

How to edit Access Control

Select Settings > Access Control > Select role and option to be modified , make your modifications and click Save Permissions

How to add Income and expense type

Select Settings > Income and expense type> Add New, fill the field and select account type and click Save.

How edit Leads Status on CRM Settings

Select Settings > CRM Settings > Select Leads Status,  select option to Add New leads or Select existing leads status to EDIT, VIEW OR DELETE.

How edit Leads Sources on CRM Settings

Select Settings > CRM Settings > Select Leads Sources,  select option to Add New leads or Select existing leads sources to EDIT, VIEW OR DELETE.

How edit Payment Methods

Select Settings > Payment Methods >  select option to Add New payment methods or Select existing payment method to EDIT, VIEW OR DELETE.

How edit Product Unit

Select Settings > Payment Methods >  select option to Add New payment methods or Select existing payment method to EDIT, VIEW OR DELETE.

How to edit Tax

Select Settings > Tax Settings>  select option to Add New payment methods or Select existing tax to EDIT, VIEW OR DELETE.

How to add File

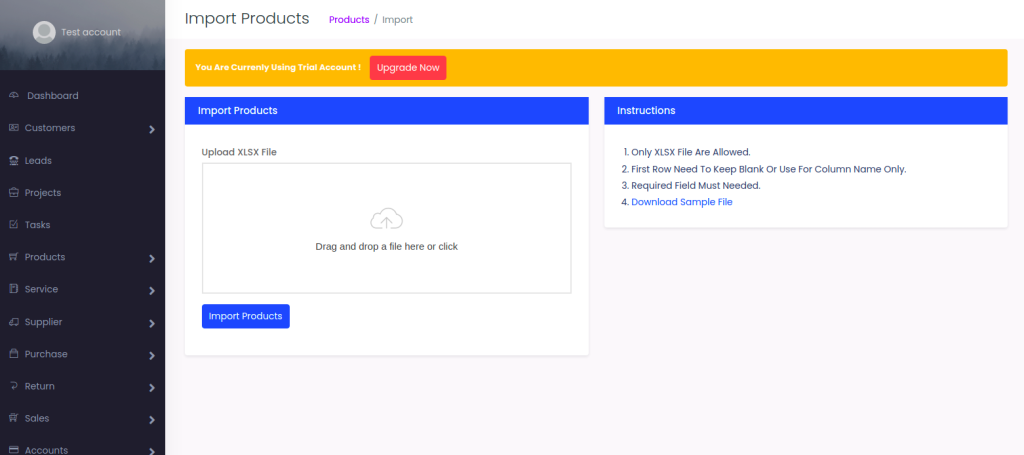
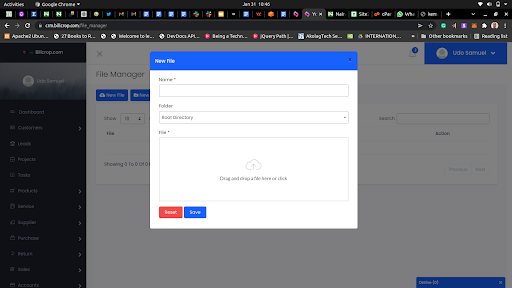
Go to File manager > select new file > add the new file and click save  Note: File Manager File Type Supported : png,jpg,jpeg,pdf,mp4,txt,doc,xlsx,csv File Manager Max Upload Size In MB : 20MB

 Note: File Manager File Type Supported : png,jpg,jpeg,pdf,mp4,txt,doc,xlsx,csv File Manager Max Upload Size In MB : 20MB

How to add Folder

Go to File manager > select new folder >  add the new folder and click save

Note: File Manager File Type Supported : png,jpg,jpeg,pdf,mp4,txt,doc,xlsx,csv File Manager Max Upload Size In MB : 20MB